Showing posts with label Inside the HOMEstead. Show all posts

Wednesday, December 28, 2011

Post Holiday Soup


My favorite things to cook usually don't require specialty ingredients or an extra trip to the grocery store. In-fact, Mr. RC Homestead has thought that I should create a cookbook combining all the ridiculous stuff in our cupboards... as I often do in a pinch.

BUT, I figure this is how most folks cook, so what's the big deal there :)

Anyhow, true to my mod-podge cooking style, I assembled the holiday leftovers for a cozy soup and I thought you may enjoy.

We hosted Christmas Eve for the first time at the Rubber City Homestead this year. Consistent with blended families everywhere, we are working to ... 'blend' well. Working would be the key word. All the kinks are not yet worked out, but we are making steady progress.

In the morning, we hosted a brunch with one-half of the family. This was a smaller gathering, but the menu covered all the bases:

Christmas Eve Brunch Menu

  • Bacon
  • Sausage patties
  • Scrambled eggs
  • Waffles
  • Mimosas
  • Coffee
The brunch was a success and while we may not host Christmas Eve brunch every year, I think we stumbled across a couple of things that we would like to turn into regular traditions!


*Grandpa RC Homestead reading the Christmas story to baby Gremlin

I believe in making the most out of leftovers, so we sorted out the goodies in the afternoon. The homestead PUP was thrilled, as he was given the leftover scrambled eggs. I tossed the sausage patties in the fridge for later and chopped the bacon for a nice addition to the evening meal with the other half of the family.

Christmas Eve Super Easy Dinner Menu
  • Corn Bake
  • Mashed Taters
  • Honeybaked Ham (courtesy of Mr. RC Homestead's employer - thank you!)
  • Lawson's Chip dip
  • Pretzel sticks
  • Peanuts from the Peanut Shoppe
  • Variety of baked and received Christmas cookies (thank you, sweet neighbors!)
Really all I had to MAKE was the corn bake and the mashed taters, what could be easier?!?!

The corn bake was simple: open the cans, stir, pop it in the oven. Meanwhile, I chopped and boiled the taters. While blending the mashed potatoes, I tossed in the bacon bits and a crazy idea hit me... why don't I toss this in a 9 x 13 and bake it a bit, too. I added a scoop of sour cream, some parsley, salt, pepper and a bit of chive, topped with cheddar cheese and off to the oven it went.

Fast forward two days...

The cookies are almost gone, and we are ready for something new to munch on, but I hate to throw away leftovers.

Time for SOUP to save the day!

I took the remaining corn bake, remaining tater bake, added some boiling water, a bit of chicken bullion, some carrots and celery... tada! Soup du jour!!!

Pair with a sandwich, or eat it up solo, this was a yummy treat!

Stay cozy,

--The Rubber City Homestead

Tuesday, December 27, 2011

Cake Bite Christmas Tree


I am thrilled to share a new combination craft and edible wonder! This particular goodie pairs for a fine treat AND hostess gift!


If my fingers were faster, this would have been published prior to the Christmas holiday. For any of you who celebrate closer to New Year's, you still have time to pop it together.


If your holiday festivities have already passed, perhaps file it away for the 2012 round of holiday fun.


To begin you will need a few supplies.


For the tree:
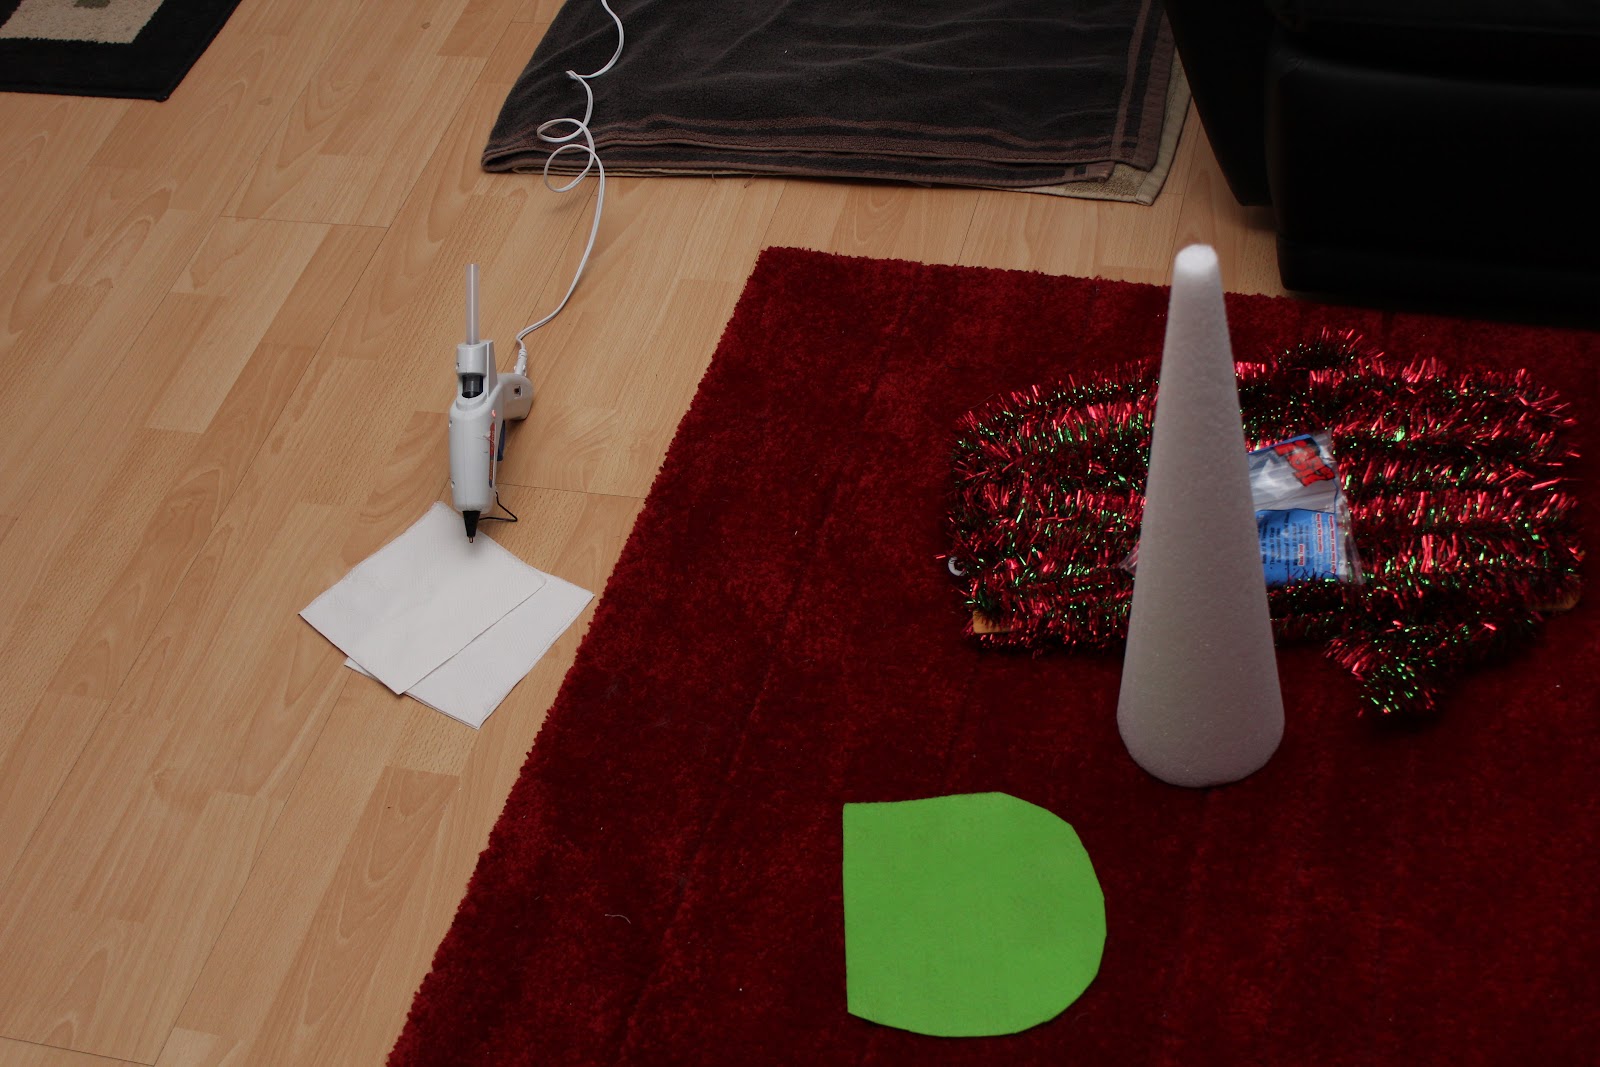
  • Foam cone form
  • One 8 x 11 piece of felt
  • Garland
  • Hot Glue Gun
  • Sparkly paper
  • Glitter
  • 6" of wire
For the cake bites:
  • Cake mix and all that it requires
  • One 'tub' of icing (Betty Crocker, or the like)
  • Candy makers' sticks
  • Chocolate wafers
  • Sprinkles
*A special thank you to my fine friend, Lauren for the cake bite instructions*

1.  Start by whipping up your cake mix and baking it per the instructions on the box. Forever a fan of all things chocolate, I opted for a chocolate fudge cake... yum    


2.  While the cake is baking, grab your foam cone, felt, garland and glue gun.


3.  Plug in your glue gun, get that cooking


4.  Cut a rough circle out of your felt, approx 1" larger around than the base of your foam cone, glue this to the bottom of the foam shape                        


5.  Cut at an angle from the outside of the felt circle toward the foam, every 2 - 3"


6.  Now make cuts the opposite direction, forming triangles around the base of the foam form


7.  Glue the triangles to the cone,  now you have a tidy little tree base


8.  Starting at the bottom, begin applying small amounts of hot glue and tightly wrap the garland around the tree


9.  Continue around and around the tree form until you reach the top


10.  Don't forget to check on your cake, it should be about done by now


11.  Pull it from the oven when it is done, let it cool


12.  Once cooled, crumble the cake right in the baking dish


13.  Dump 3/4 of the icing tub onto the crumbled cake, mix with your hands. If the cake does not hold together when you put some in your palm and squeeze together, add the remaining 1/4 tub of icing.


14.  Pop cooled baking dish with cake/icing combo into the fridgerator for at least 2hours.


15.  Now you can make the star for your tree. Cut a pair of stars from your sparkly paper, run a line of glue around the edge, drizzle with glitter


16.  Take your 6" of wire, twist so that you can tape to the inside of the star and wrap at the very top of the tree


17.Once cooled, pull your cake blend from the fridge, with the help of a melon baller (or not), roll the cake into 1" balls and place a candy stick into each one, place in a freezer-friendly sized dish. When the cake is all 'balled' pop the dish into the freezer to add a bit of firmness to your creation. Freeze as long as you can. I have heard that 30 min is good, 2 hours is better...


18. Back to your star. The glue and glitter should now have dried. Tape the wire inside one of the stars, glue them together.


19.  Aaaannnddd back to the cake balls... Using a double broiler or the microwave, melt your chocolate


20.  Pull the cake balls from the freezer, dip into the chocolate

21.  Decorate with sprinkles or drizzled chocolate


22.  Let set


23.  Once fully set, plug the cake bite pops into the tree as ornaments :)


24.  Share with the hostess with the mostess or your amazing sister-in-law... or both if she happens to be my sister-in-law!

Hope you and yours had a wonderful Christmas!

--The Rubber City Homestead

Tuesday, December 14, 2010

The Majic of Epsom Salts!

When I was a little girl, my grandmother would get all the girl cousins together for a sleepover in early December. We would play, share secrets and make memories together.

Grandma also saw to it that we were not left empty handed in our holiday gift giving. She helped us to create a wonderful home remedy for our Mothers.

Wednesday, December 8, 2010

Monday, December 6, 2010

Delicious Soup for a Snowy Afternoon

The yard and the street are filled with a gorgeous coating of white frosting and the spirit of the season is cooking in my heart.


Today the husband was able to work from the homestead, quite a pleasant surprise for a Monday! Due to the fact that we were both 'in the neighborhood', I decided to make a special treat-- potato soup.


Snowy Day Potato Soup
  • Ten medium sized taters
  • Three stalks of celery
  • Three cloves of garlic
  • 1/2 Onion
  • 1 can of chicken broth
  • Half a 'log' of sage sausage
  • Bit of parsley
  • Dash of pepper
  • Pinch of salt
  • 1/2 C milk
  • Bit of Pensey's Peppercorn
Toss the sausage into the skillet to brown. Decide if you want to leave the skins on, or take them off of your taters. Skin, if you like and cube the potatoes. Steam or boil them down to a soft texture. Chop up the celery, garlic and onion. Add all the contents to the crockpot (which I just learned is a brand... not a product-- 'slow cooker', if you please) or pot on the stove. Let everything simmer together for an hour or two. Enjoy.


For some reason, this recipe went incredibly well with a piece of toast with peanut butter on it. Give it a whirl. mmm. yum. yum.


Happy snow day, cozy night, and warm hearts to all those in the Rubber City tonight!

Wednesday, December 1, 2010

Chocolate Chip Nostalgia on the First Snowy Night of the Season

To the best of my knowledge, last night's 'snow shower' was the first of it's kind in 2010. In the spirit of coziness, I decided to bake up some chocolate chip cookies.

Tuesday, November 30, 2010

Very Exciting News...

Very Exciting News to Share.....

Some of you may have been hip enough to have ventured into a new local classic, Hazel Tree Interiors (the old Norka Futon shop) on Market Street. For the rest of you-- get on down there, the collection is fantastic!  Great vibe, things you want for your home!
Mural
(photo from Hazel Tree Interiors site, http://hazeltreeinteriors.com/)


Through the month of December, Hazel Tree Interiors has opened their hearts and retail space to Akron artists of all kinds!!!

Hope You (and Yours) Survived the Holiday!

Good morning!

Hope you found your way through the sticky waters of the onset of 2010's holiday season!  My goodness! We were fortunate to have some wonderful family and friends in town and even got to visit with most of them ;)

As we collectively cruise past Thanksgiving and migrate a tinge closer to (brace yourself)... Christmas, perhaps we should make a game plan. One of my girlfriends recently shared with me the Thanksgiving preparation list that her 80+ year-old grandmother had made. Not only did the list reflect what happened last year, details as to which appetizer was most appreciated, and who did not receive a full portion of left-overs to take home-- this amazing woman also logged prices for her feast purchase and time tables for the work. WOW!  May I extend myself to say, they just don't make em' like that anymore! The 70-80 y/o's are just the example that we all could learn a thing or two from! What amazing work ethic, morals, passion, perspective... and (most importantly) heart!

Back to lists. I find that lists enable me to focus on the job at hand, rather than the millions of things I need to remember. If that 'speaks' to you, let's proceed.

If you have not started already, how about we prepare a couple lists together?!?
What might the lists entail?
  • Presents-- who are we buying (crafting) for, and what shall we give

  • Food-- what dishes need to be prepared, where are we taking them, and when should we prep (or order) them

  • Decor-- when is it going up, when is it coming down. Pencil in a good couple hours for a friend or spouse to help with the assembly or disassembly so that you don't get worn-out

  • Family/Me time-- SCHEDULE (yes schedule) some time alone, with your spouse, with your children to pause this holiday. Perhaps a mani/pedi. Maybe a hockey game. Consider a hike, a game night, or a dinner together. Make some quiet memories, too.

  • Appointments-- medical, dental, automotive, etc. Get the most out of your 'benefits', if you have not already done so. Let's be real, sometimes we need to squeeze the 'not-so-fun' stuff into the holidays, as well.

Alright. You've got your lists, now let's go shopping, right?!?!? Patience young Jedi.

After the lists you have at least earned yourself a cup of hot cocoa. Enjoy. Take a deep breath and enjoy the fresh air!

There are a lot of fun ways to enhance the holiday experience without adding any events to the calendar. For example, think about cutting down your own tree instead of zipping over to big Wally, pit stop for cocoa on the way home and make a memory or two. Have the kids help with cookie delivery to the neighbors and sneak in a mention of the reason for the season. Something crazy-- bring treats to a relative and when they open the box of goodies, it also becomes an appetizer-- sneaky, but good technique I learned years ago!

The West Side Leader offered some great notes on the trees:
http://www.akron.com/pages.asp?aID=10931

And the Beacon Journal added a great scoop on some different local activities:
http://www.ohio.com/entertainment/shinn/110562244.html

You've got this!

Happy Holidays,

The Rubber City Homestead

Friday, October 29, 2010

A Space to Call Her Own


My husband is a wonderful, kind, and generous man. That said, our decorating styles differ a great deal. While I totally respect his clean lines and modern (albeit tidy) color choices, they are not the same tones that inspire my creative side. Like all things between the ‘man of my dreams’ and I, we were able to compromise without much fuss at all. His tones and polished presentation are evident in the living room, the kitchen, the main bathroom, etc.

You may ask, Well where do you fit in, then?

The answer is simple…

I take it to the SHE LAIR

Men often claim a ‘Man Cave’; I find my solace in the ‘She Lair’.  (To the best of my knowledge I made up the term and you are welcome to adopt it as well).

The She Lair is everything hodgepodge, colorful, warm, feminine and collaborative. The She Lair reminds me of where I come from, while encouraging me to stretch my crafty arms out to embrace the next creative challenge.

How is this all accomplished in a single space? The majic began when I carved my personal lair out of an under utilized and often cluttered area of the basement. Truthfully, the She Lair is one space which has been subdivided into three areas.


The first is my mini lounge. Here I have a comfy Ikea couch (doubles as a fold-out for any traveling friends and family—come on over!!!), a fully functional-good-height-for-sitting-under coffee table (important that this isn’t too fancy because projects often spill over here), an over-sized chair, radio, and an archaic TV.

This area is great to read up on (blogging) any new creative endeavor, The West Side Leader (because it is the world’s greatest local newspaper), or to entertain nieces and nephews with a cartoon and a crafty project. Wonderful!

I keep it colorful; quilts often cloak the couch and chair with for an added cozy feeling and offer a convenient cover-up on chilly mornings. I like to hang funky things around my She Lair to make it an interesting space that conjures up ideas of distant lands or interesting people.


I was compelled to include a 'library book station' because I always have a couple (dozen) books checked out for my reading pleasure.


Next, I divided the main space in half by hanging two-ply curtains across the majority of the room. The lounge side celebrates a subdued pale green, while the work space boasts a bold red.

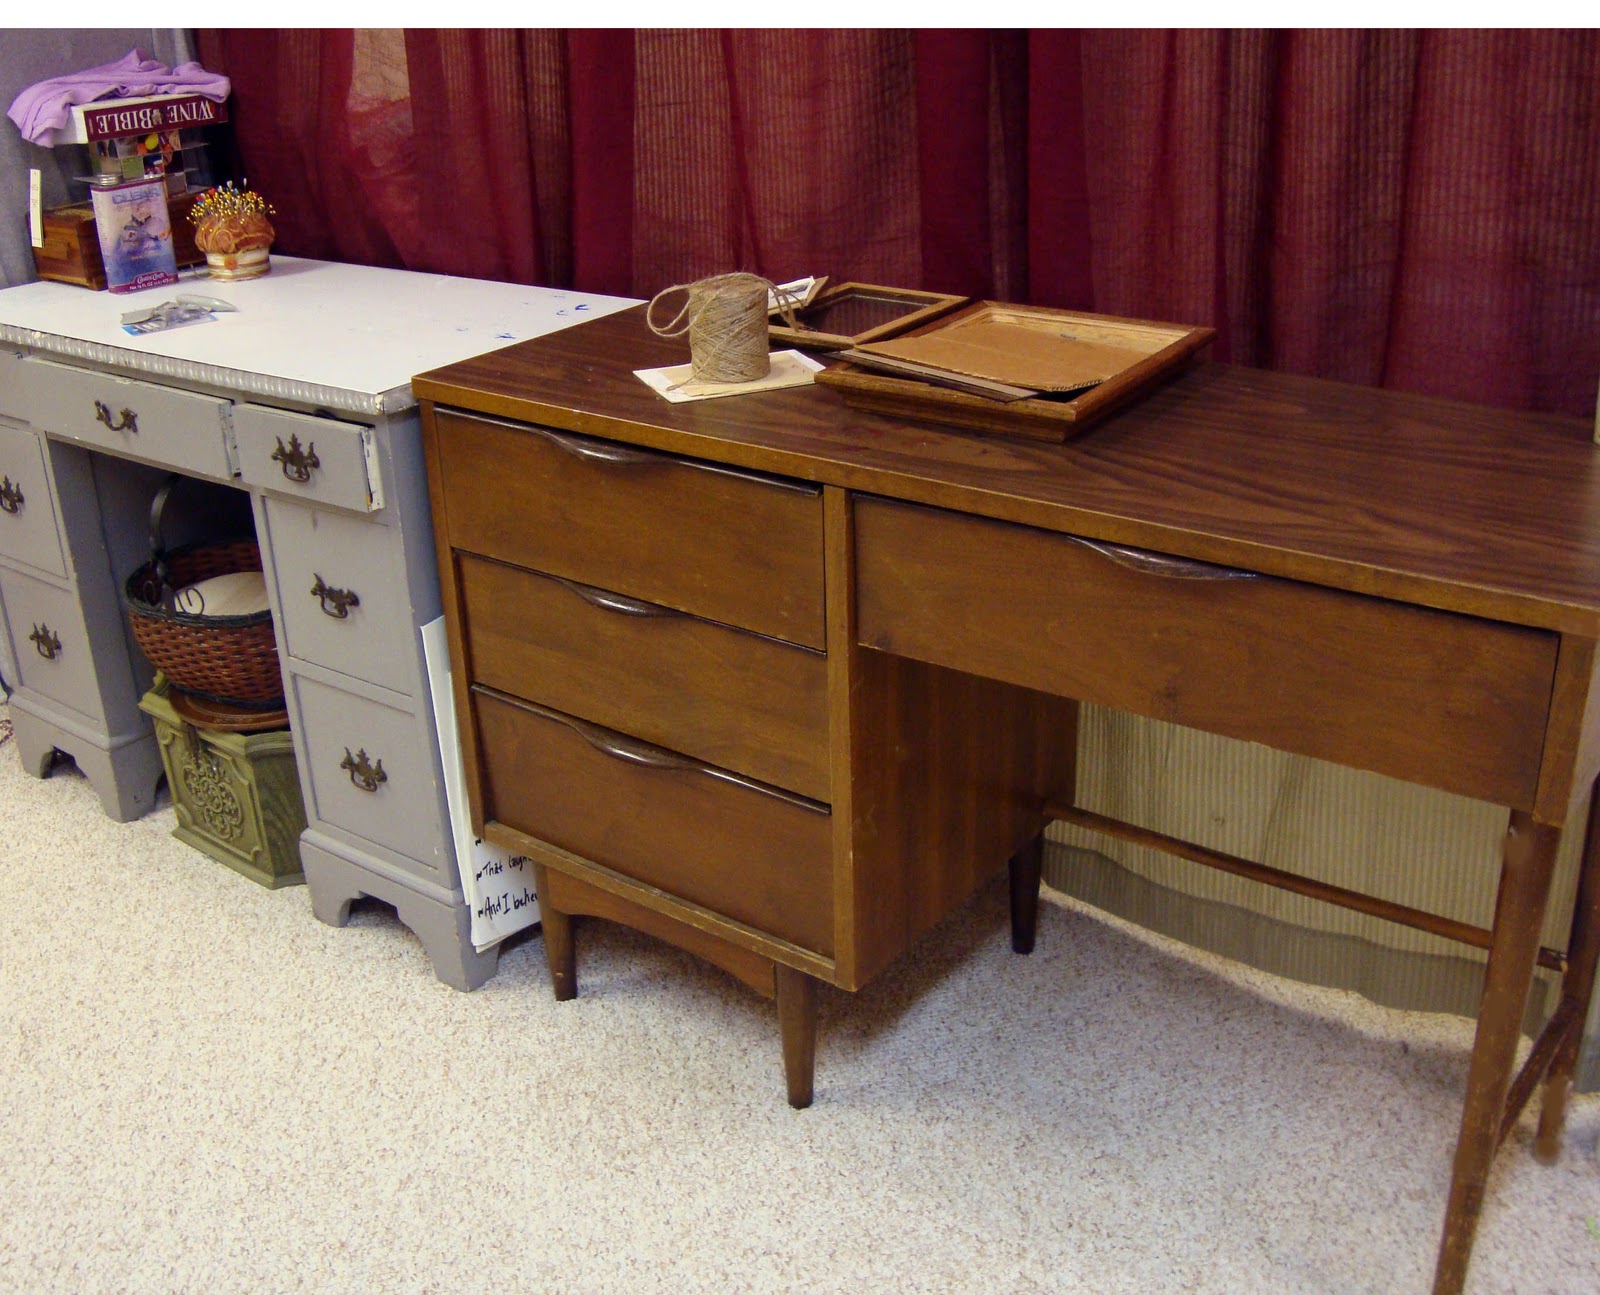
The work space includes a few salvaged desks that are lined up in a row (easy to find at a yard sale or vintage shop for under $20).

The length of ‘table top’ is particularly helpful in sewing projects, banner painting or any number of other crafty inspirations. The desk drawers are great for housing beads, paints, ribbon, sketching materials or whatever your heart desires.

The work space also has a series of stacked Rubber-Maid-type drawers that separate and strive to organize my fabric patches. The goal is to have fabric sorted by color or type, though I often fall short of this goal and store everything in a compilation style. Projects go together, etc.

The sewing machine and a magnet board for inspiration and project status are also found in the work space. I keep a mirror to check out any ‘wearables’ and a healthy sized trash can to help me strive for the tidy, as well.


Thread, anyone?

The final ‘area’ in my She Lair is the office. Here I work on posts, plan ahead for future endeavors, pen ‘thank you’s to kind and generous people in my life and strive to keep abreast of all things Internet. I keep a clothes line of ideas strung across part of the room where I can easily 'pin up' new projects, inspirational magazine pages or notes on how to improve something I am working on. The clothes line is an evolving display of what is on my mind and how I hope to tune my creative impulses.
 
WOW! What a space!

Honestly, there was a day, not too long ago when I was lucky enough to have all my sisters-in-law in one state for a couple of days. My husband and I were newly married and excited to show the ladies the house and our progress in the yard. When the tour extended to the basement, I was mortified to hear that they were interested in touring the creepy ‘extra room’… where clutter was king and boxes were stacked all around.

Who knew that one day, this under utilized area would become my haven?!?! Don't be discouraged by the quest to find the space for 'your creative place'. While my She Lair is anything but posh or modern, it is a functional space for both my husband and I, as well as any others who stumble by.


A couple of things that make my She Lair a place where I enjoy spending time…


A ‘killer’ sign for the door. This piece was reclaimed by one of the coolest ladies I know when she was on vacation. I don’t think I need to say any more about this ‘signage’. The message is clear J


Certainly wouldn’t be complete without a picture of the pup… this is our boy, the best darn fuzzy goodness in the world!  J

A lovely painted card that I picked up on Gig Harbor. The featured flower is the ‘trillium’, frequently found in the Pacific Northwest, but oddly, the state flower of Ohio. Pretty cool! The artist was a total inspiration. She shared a gallery space with a whole collection of artists, right off the Harbor. She told us about her acquired oriental name (lower right of image) and how she obtained it. Very neat lady!


A nook that has several things that speak to me. Pictures of family and friends in silly or serious frames, on a shelf that my uncle made, upon which hangs a string of angels my mother gave me years ago (to watch over me), under which hangs a gorgeous needlework gift from my confidant and fellow butterfly admirer J


A beautiful piece painted by a friend I do not get to see enough. Some how she was able to capture the intimacy of close friends and the season they enjoy together without saying a word.


Should I be looking for a volume discount at this point?


'Open House' weekend at the ski bump (Boston Mills) is always the most gorgeous weather! I just had to pull over and take this shot. Riverview Road, Peninsula OH. Circa 2002.


Reclaimed dairy tote filled with all sorts of yarn. Sometimes I try to do my Grandma proud (God rest her). She was ALWAYS trying to teach me to crochet as a little girl. Any tips on how to make this a more streamlined process? It is one of those practices I keep picking up... but it never seems to 'take'.


A design project from college-- YEARS AGO-- it still makes me smile... I mean hum.


Collections of interesting things can be found anywhere and everywhere in the She Lair.


How to make a She Lair for yourself?

Perhaps reclaim an under utilized closet, insert some modular shelving and allow space to pull up a chair when the door is open. Put one of those awesome hula dancer lamps (like in ‘Joe Versus the Volcano’) to set the tone and the rest is up to your imagination.

Or carve out a space in the garage. Square off a corner, section off the space with curtains or shelving. Hang a light from one of those hook screws and put a piece of plywood on crates or filing cabinets to create a desk. Light a scented candle to take the ‘garage smell’ out of your area and to fill your nostrils and mind with comfortable and creative inspiration.

Do what you must, but find, make or reclaim your She Lair soon! When you have the space to dream, your next project is as close as you fancy.

Good luck! 


Tuesday, October 19, 2010

What’s Under Your Sink

Howdy.

I suppose there might have been a better title for this round. Perhaps, “What Do You Want to Get Off of Your Counter” might have better summarized my motivation for this particular commentary.

For some time now, I have been frustrated by the fact that my limited counter space is intermittently consumed by this or that. Still, I lacked the perspective (or five quiet minutes) to pinpoint the problem and seek out a solution. All this… until now.

One of the ‘collections’ that frequent my counter tops are the darling recyclables. The other primary contributor is the lovely collection of ‘to-be-taken-out-to-the-compost” effects of various natures.

Aaahhh. I type away eagerly at my keyboard now with a smile on my face and the knowledge that my countertop collections have been reduced (oh my goodness, I cannot believe it!!) by TWO!

When I paused to appreciate that the recyclables and compostables were sucking away most of my precious countertop on a regular basis, I immediately set to finding a solution.

Some folks (including my awesome in-laws) are cool enough to have an installed recycle bin in their knock-out new kitchen. Presently, the hubby and I are more of the “jazz it up” variety. As such, my counter top clearing remedy was rather simple. I headed straight on over to Target and grabbed myself two small trash cans. (Yes, we already had one).

I selected the first of my new Target receptacles to adsorb our recyclables. I wanted a lidless option that would be easy to toss cans, bottles, junk mail, and plastic bags into. Allthewhile keeping in mind that the new addition to my under sink space would have to share the cu in I had to offer.

Next, the quest for a compost can. This proved a little more time consuming. Compost, as we know, doesn’t smell too bad when it is out in the yard, cooking down to gorgeous fuel for the garden. Under the sink, prior to decomposition, however, these goodies can be a hot stinky mess. For this reason, I selected a small trash receptacle that had a foot press, flip-top lid. A regular plastic grocery bag could fill the entire container (again proving that there are thousands of uses for these little bags).

Consistent with the hubby’s streamlined household theme, I opted for black for both of the containers. Looking back, I am sure they could have been tangerine and it would have been fine, as they now have a permanent home under my kitchen sink.

Here, you will see not only my amazing doodling abilities, but also a brief diagram of my undersink.


Hopefully, this simple rearrangement will help others to declutter their world (or counter)!!!!


Best of luck Urban homesteaders!

Thursday, October 14, 2010

Welcome!

Welcome to the Rubber City Homestead!


What is the Rubber City Homestead, you may ask?!?!


The homestead has a number of components. First, a home garden where we grow as much food for our table as possible. Second, an attempt at organic lawn care and sustainable household practices. Next, we craft, build and improvise whenever possible. Thrift stores, garage and estate sales don't intimidate us, though we are realistic about the short hours in our weekend. Someday we may move the family to an area of the country where organics are more readily available and sustainable living is a bit more accessible. Until then, we will post what we have learned on the Rubber City Homestead in an attempt to help others and share the nearby resources.


In short, my husband and I are on the train, we have joined the motivated and the resourceful masses who seek to provide a more nutricious and wholesome life for themselves despite their urban local.  After a few years of gardening and a solid foundation of resources and recipes we are getting closer to our goal of eating food that comes from our area. I like to think that we are an innovative pair, refurbishing, crafting and combining whatever we can to meet our household needs.


A desire for the sustainable, a craving for healthy living, and some jonesing to communicate with others that share the same passions in the urban realm... this is where the concept for Rubber City Homestead was born!


May you live healthy, eat well and grow strong.


the Rubber City Homestead